Today, you will learn how to easily create your own blog and start a WordPress blog. Blogging will change your life and allowed you to earn a few dollars a month if you keep doing it.
Ok, let’s get started.
1. Get domain name registered.
Choose a reliable domain registrar. What I use is Namesilo which is a highly rated domain name registrar (the internet cheapest domains) web hosting provider and email hosting solution that is known for low prices and quality support. It uniquely offers the ability to back-order a domain for those who want a particular domain that is not presently available.
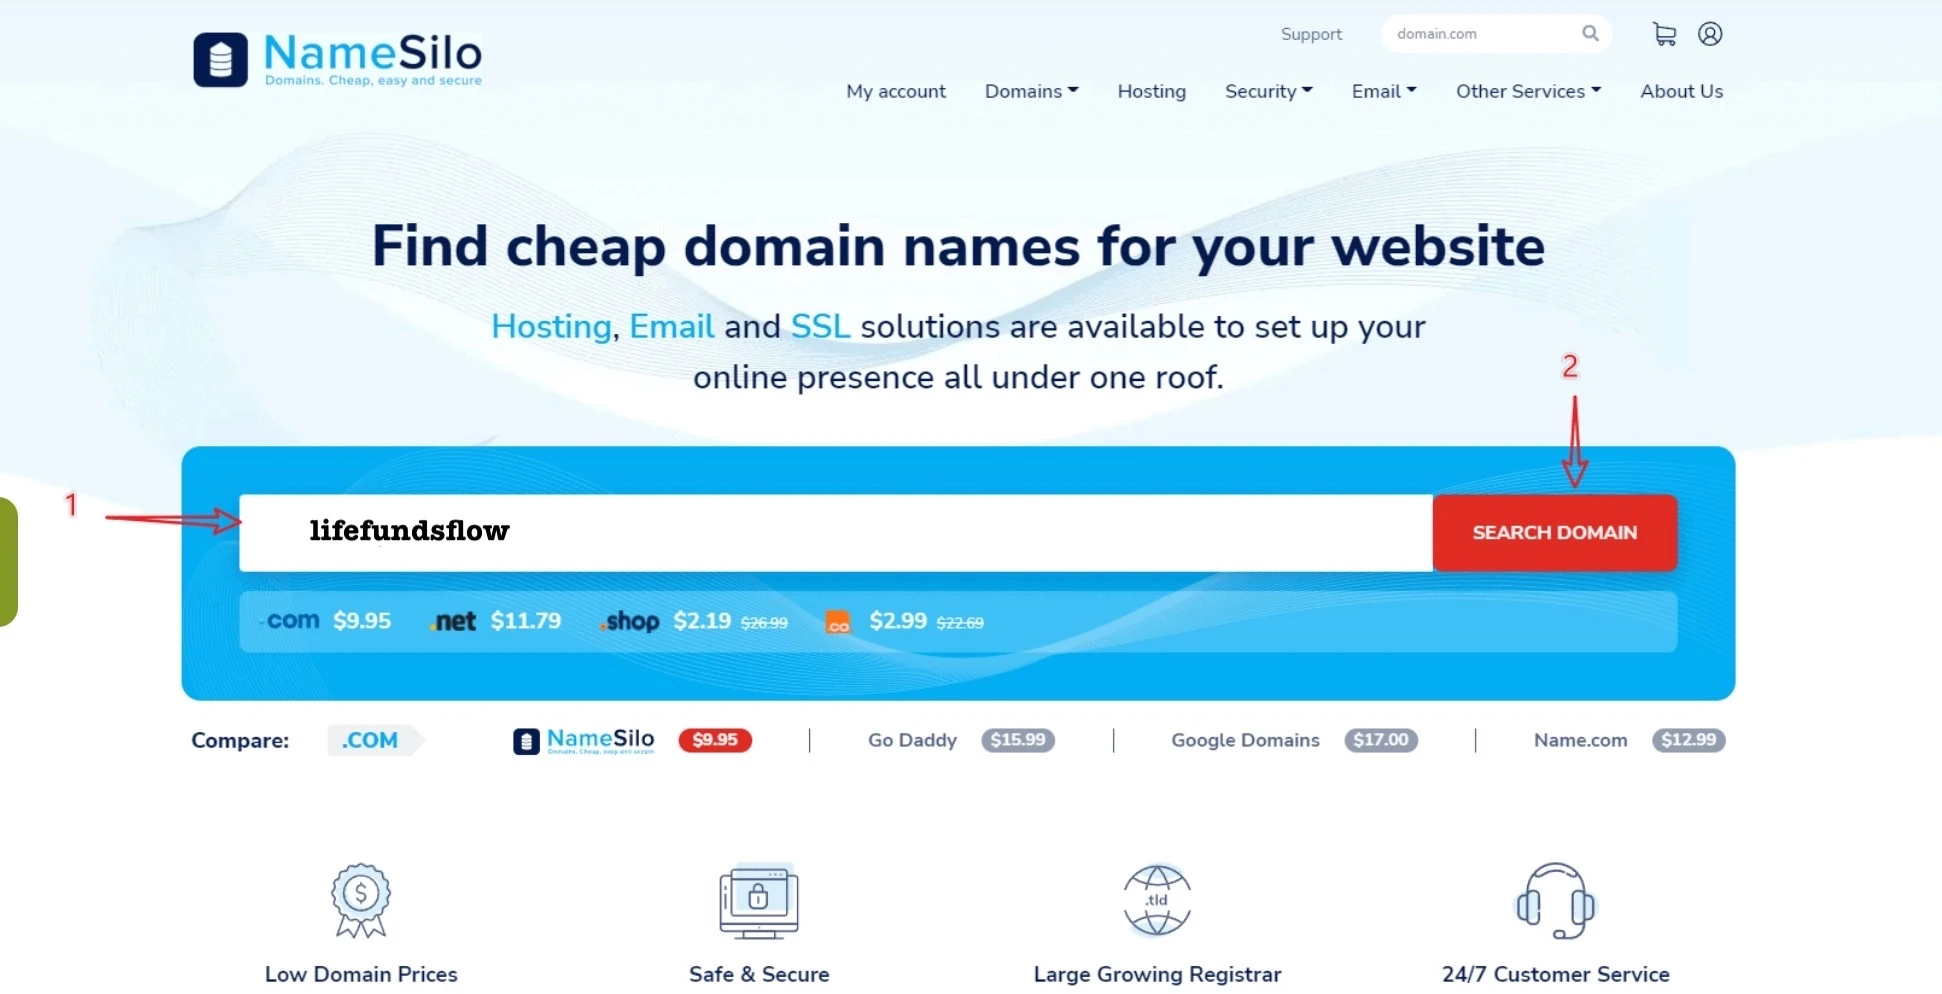
Register account at Namesilo and then search the domain you like to make payment. Go to {manage my domain} setting, you will see your registered domain in there.
2. Buy hosting for your blog.
After you’ve purchased the domain name, the next step is to buy your web hosting. The web hosting what I use in Contabo which is a German company, previously known by the name Giga-International. It’s mainly focusing on advanced Virtual Private Server (VPS), Virtual Dedicated Server (VDS), and dedicated server hosting. Contabo GmbH was established in the spring of 2003 in Munich, the capital city of Bavaria, southern Germany.
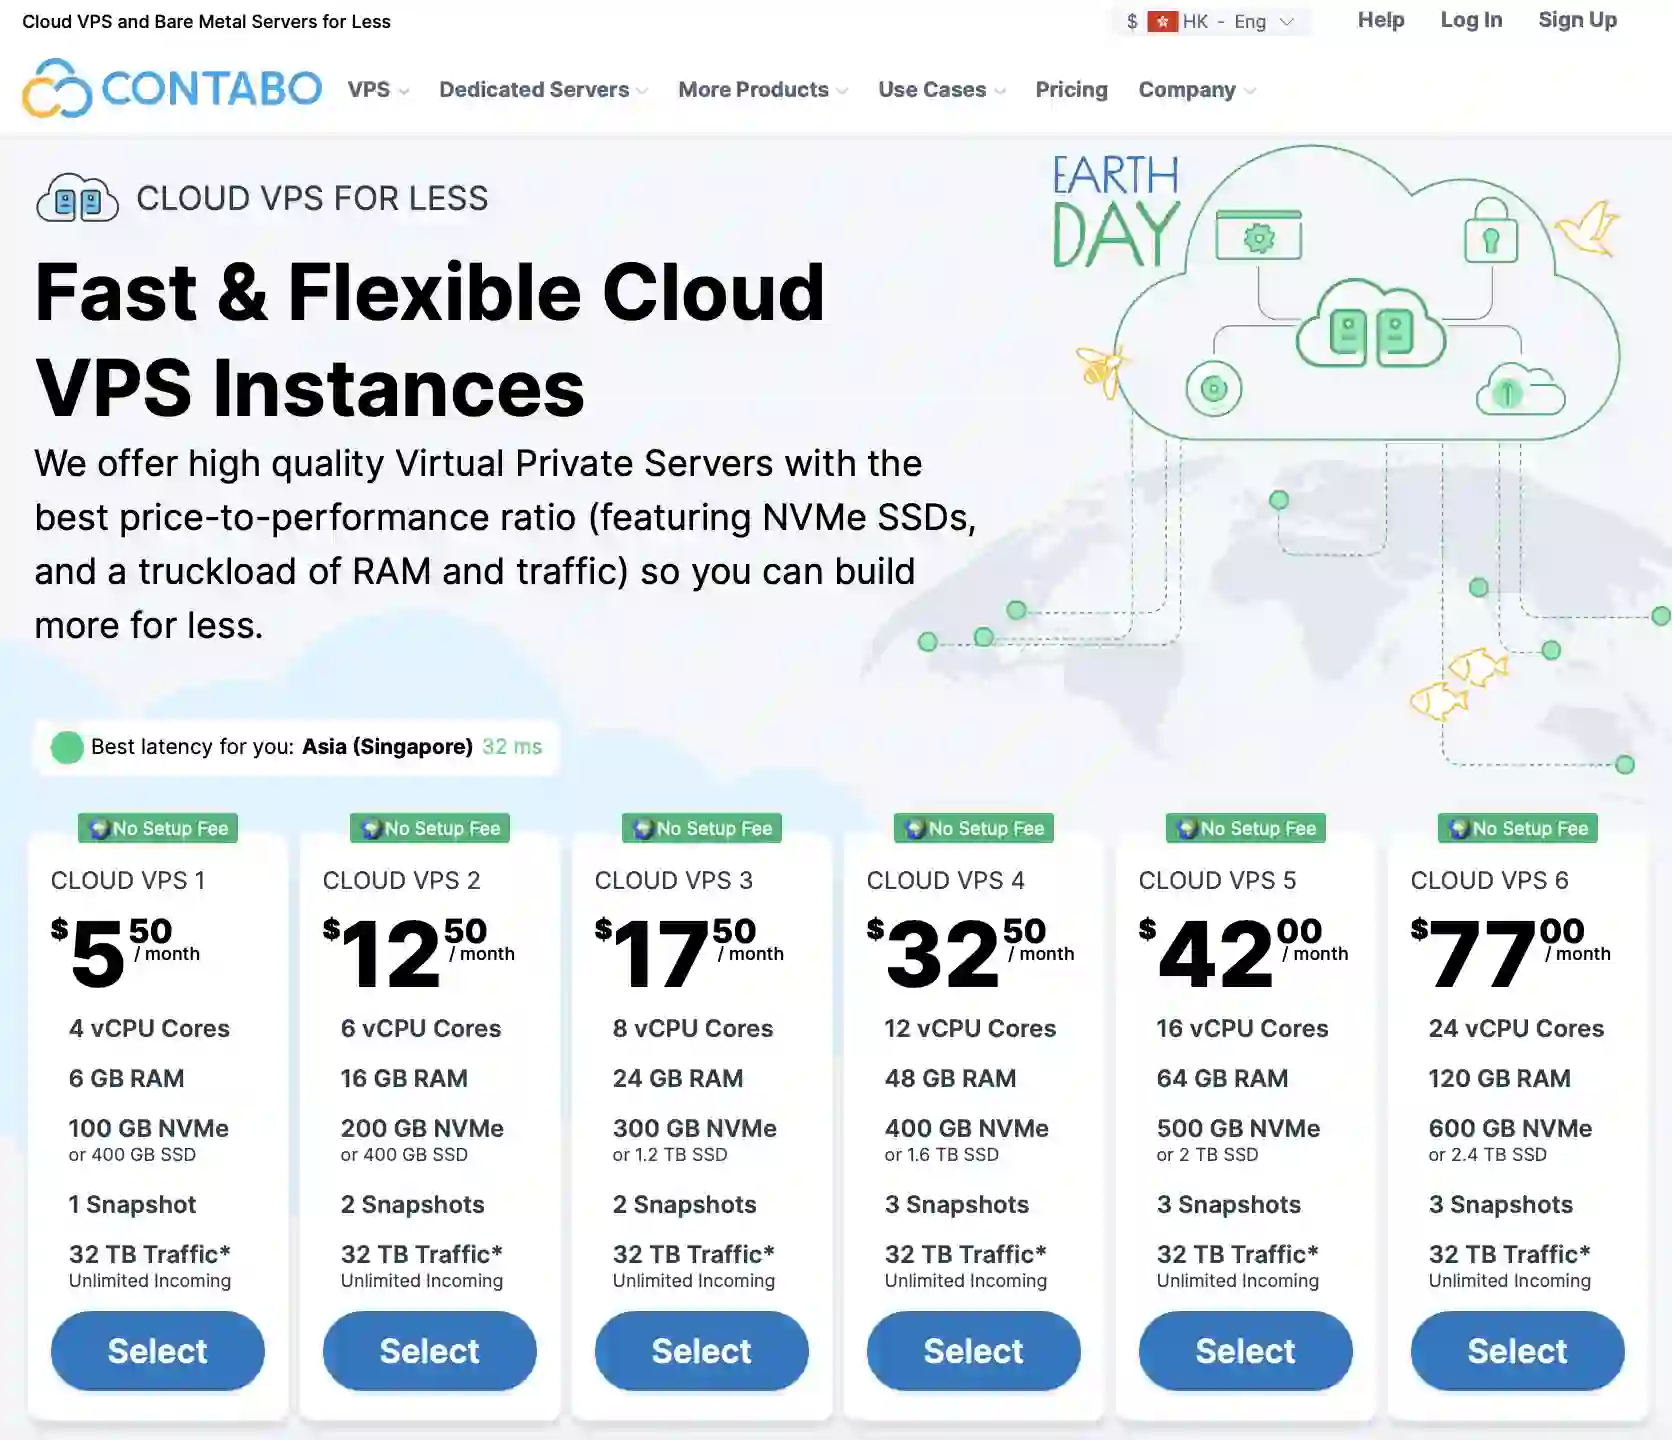
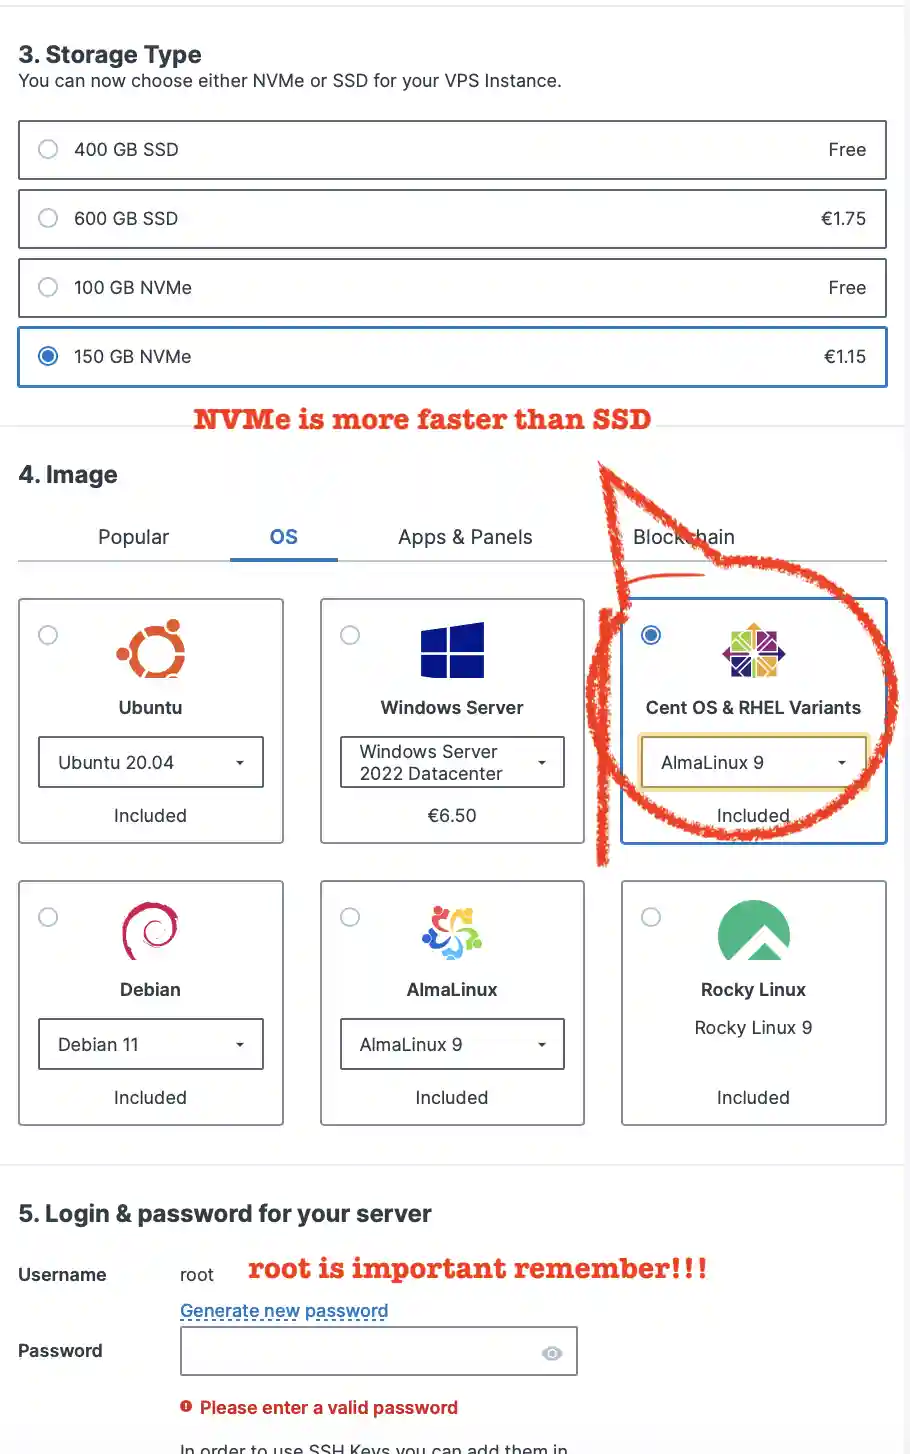
As a new blogger, I recommenrd to choose vps 1 or vps2. During the registation process, storge type what I choose is NVMe and os system is Almalinux 9. You can also choose other OS systems.
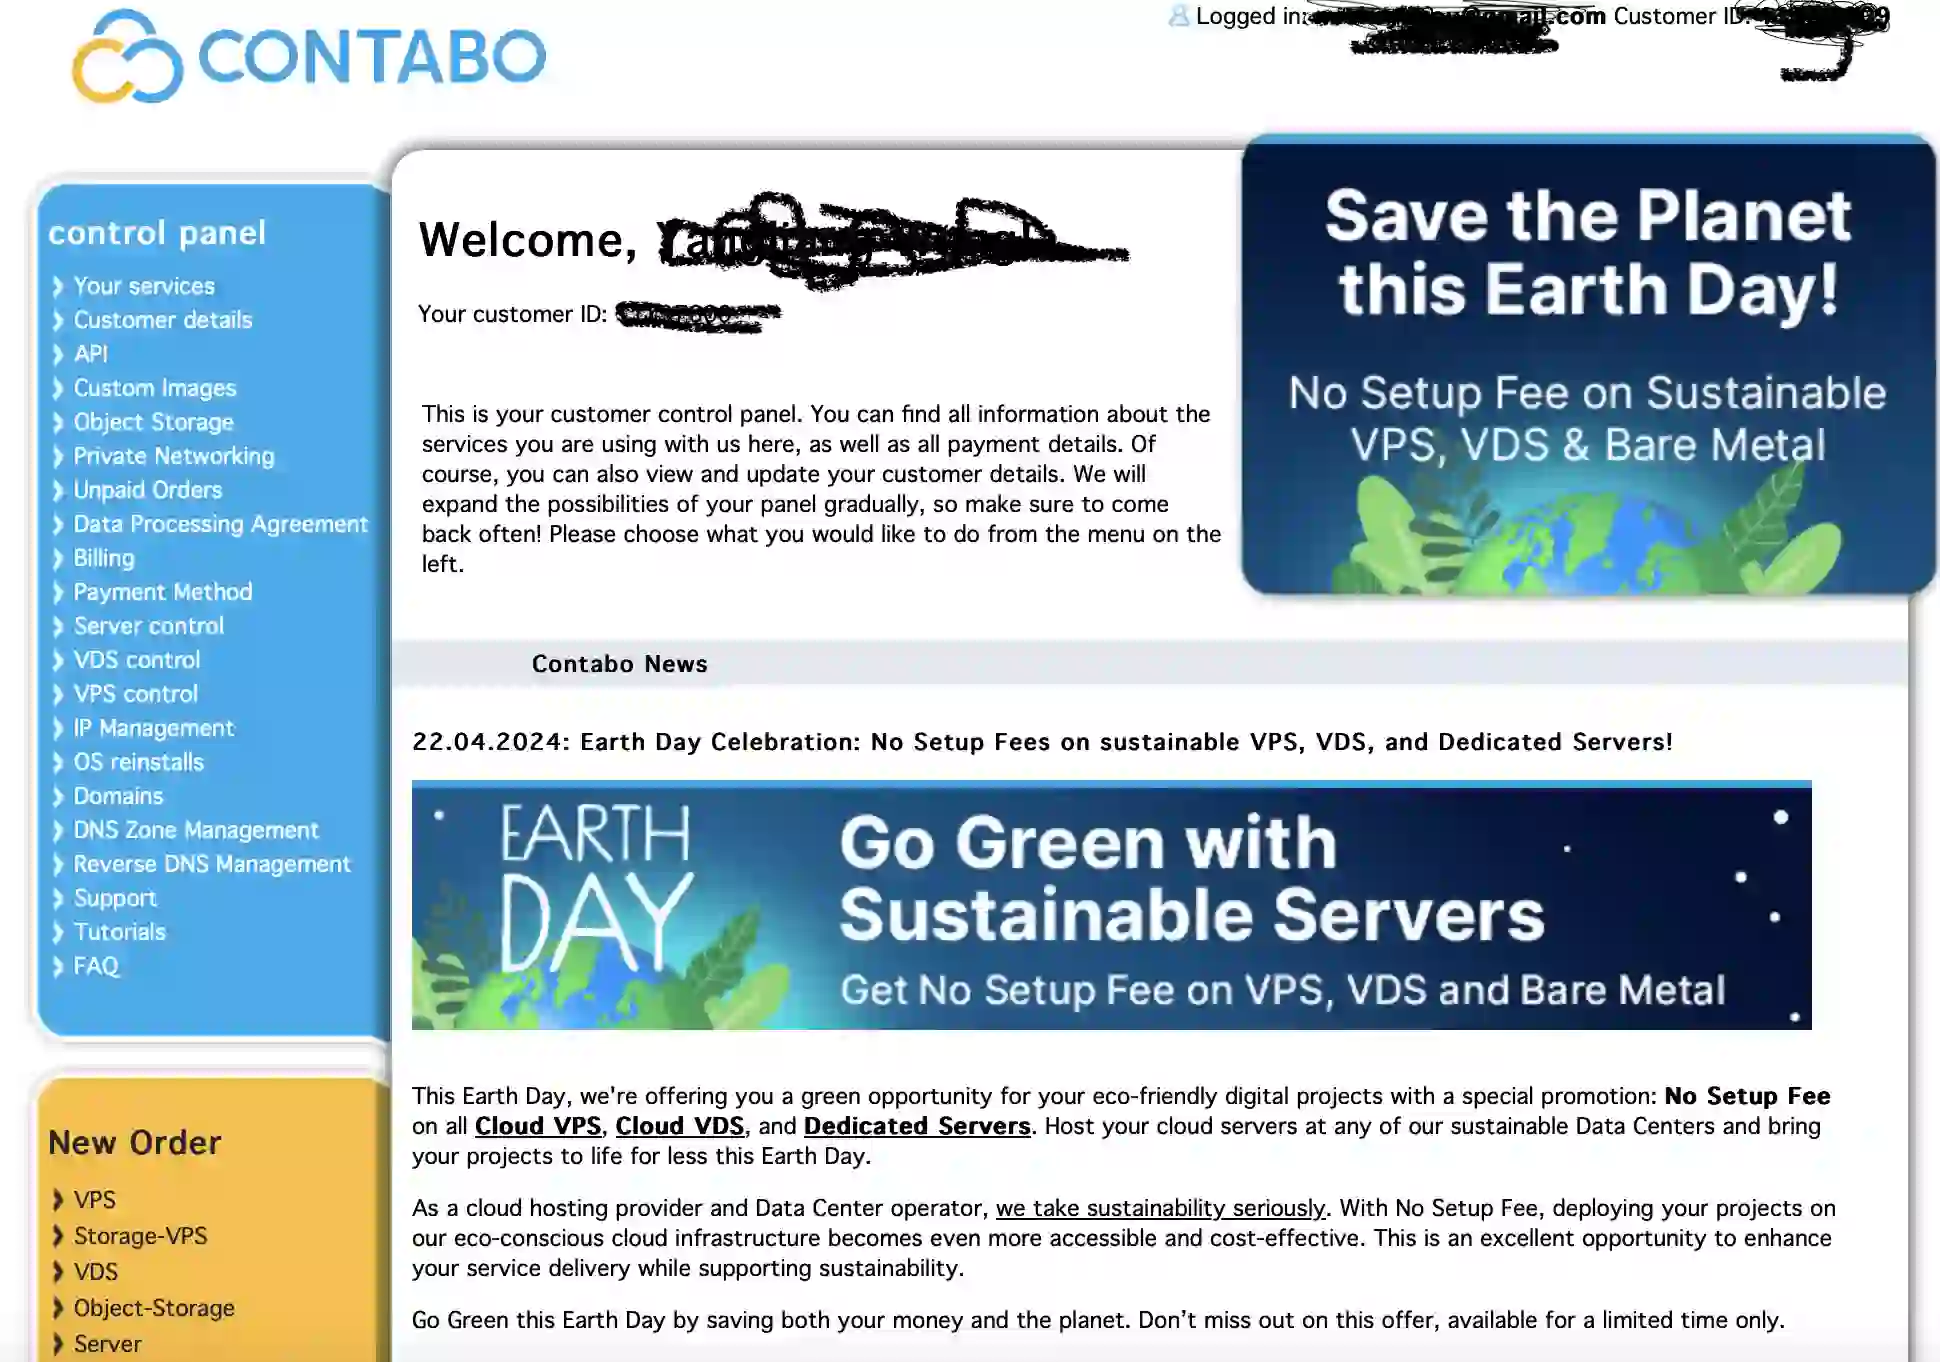
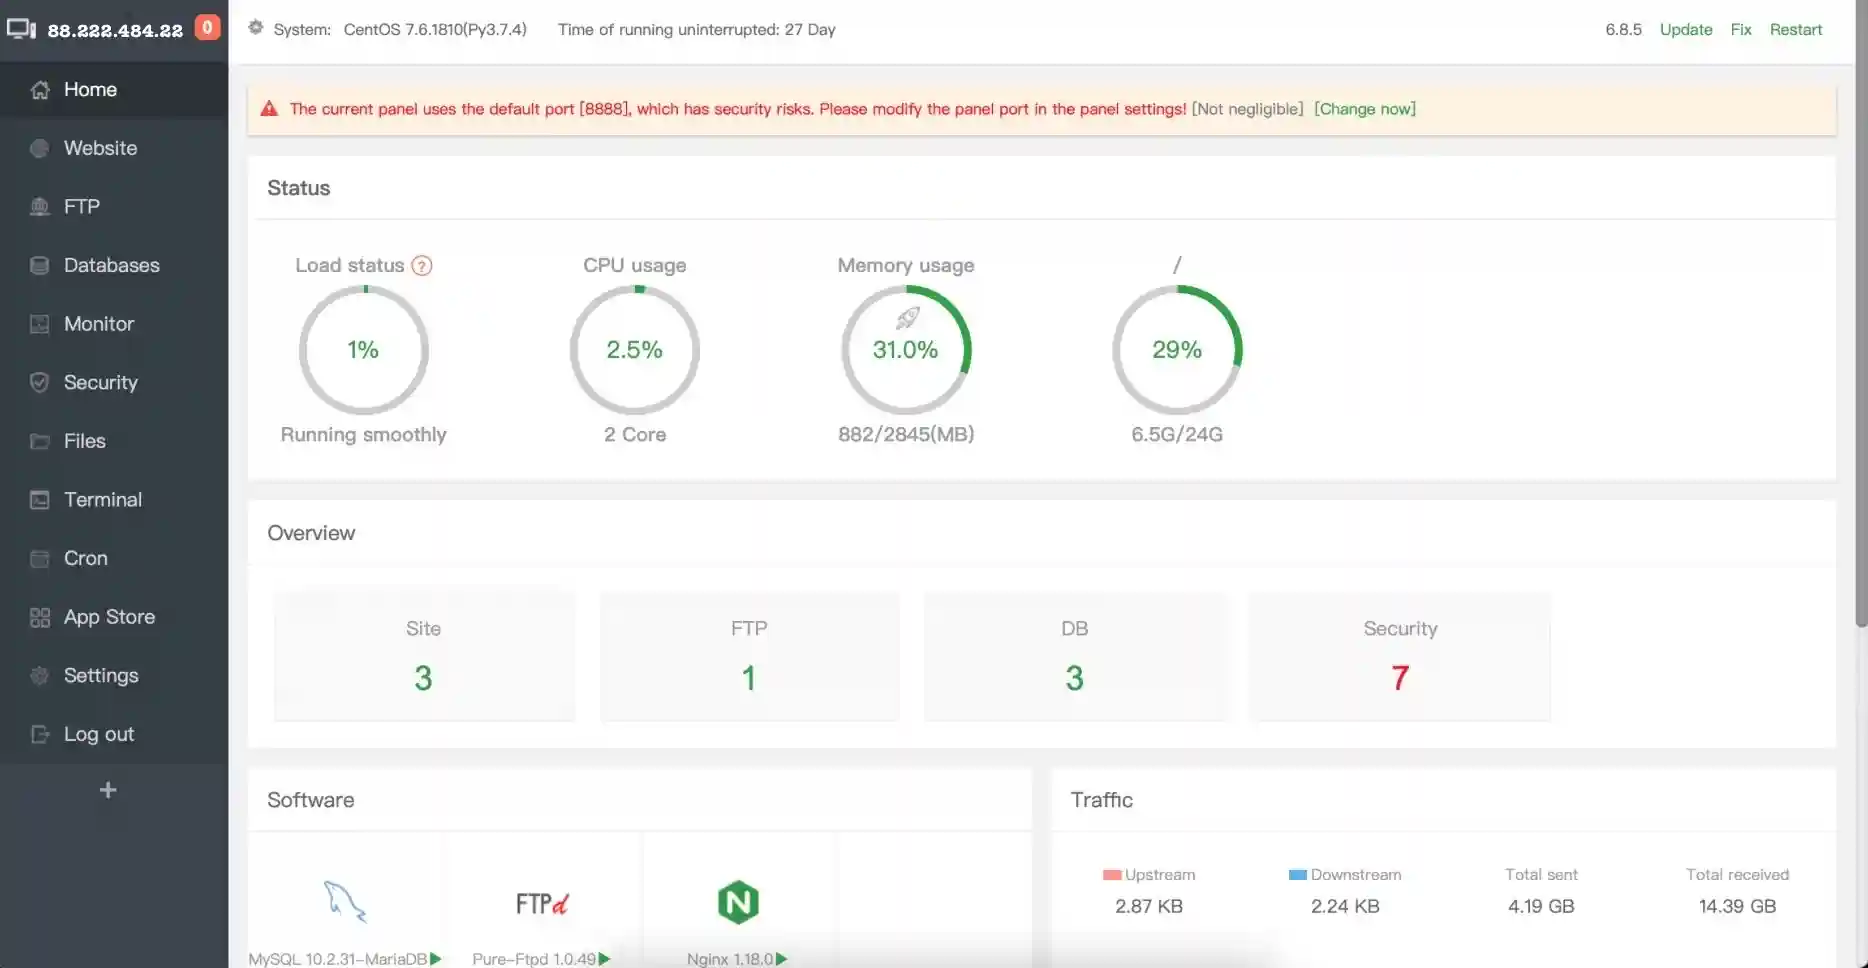
After you make payment, log into your account and you will see your control panel.
your click [Your services],you will see pic as below:
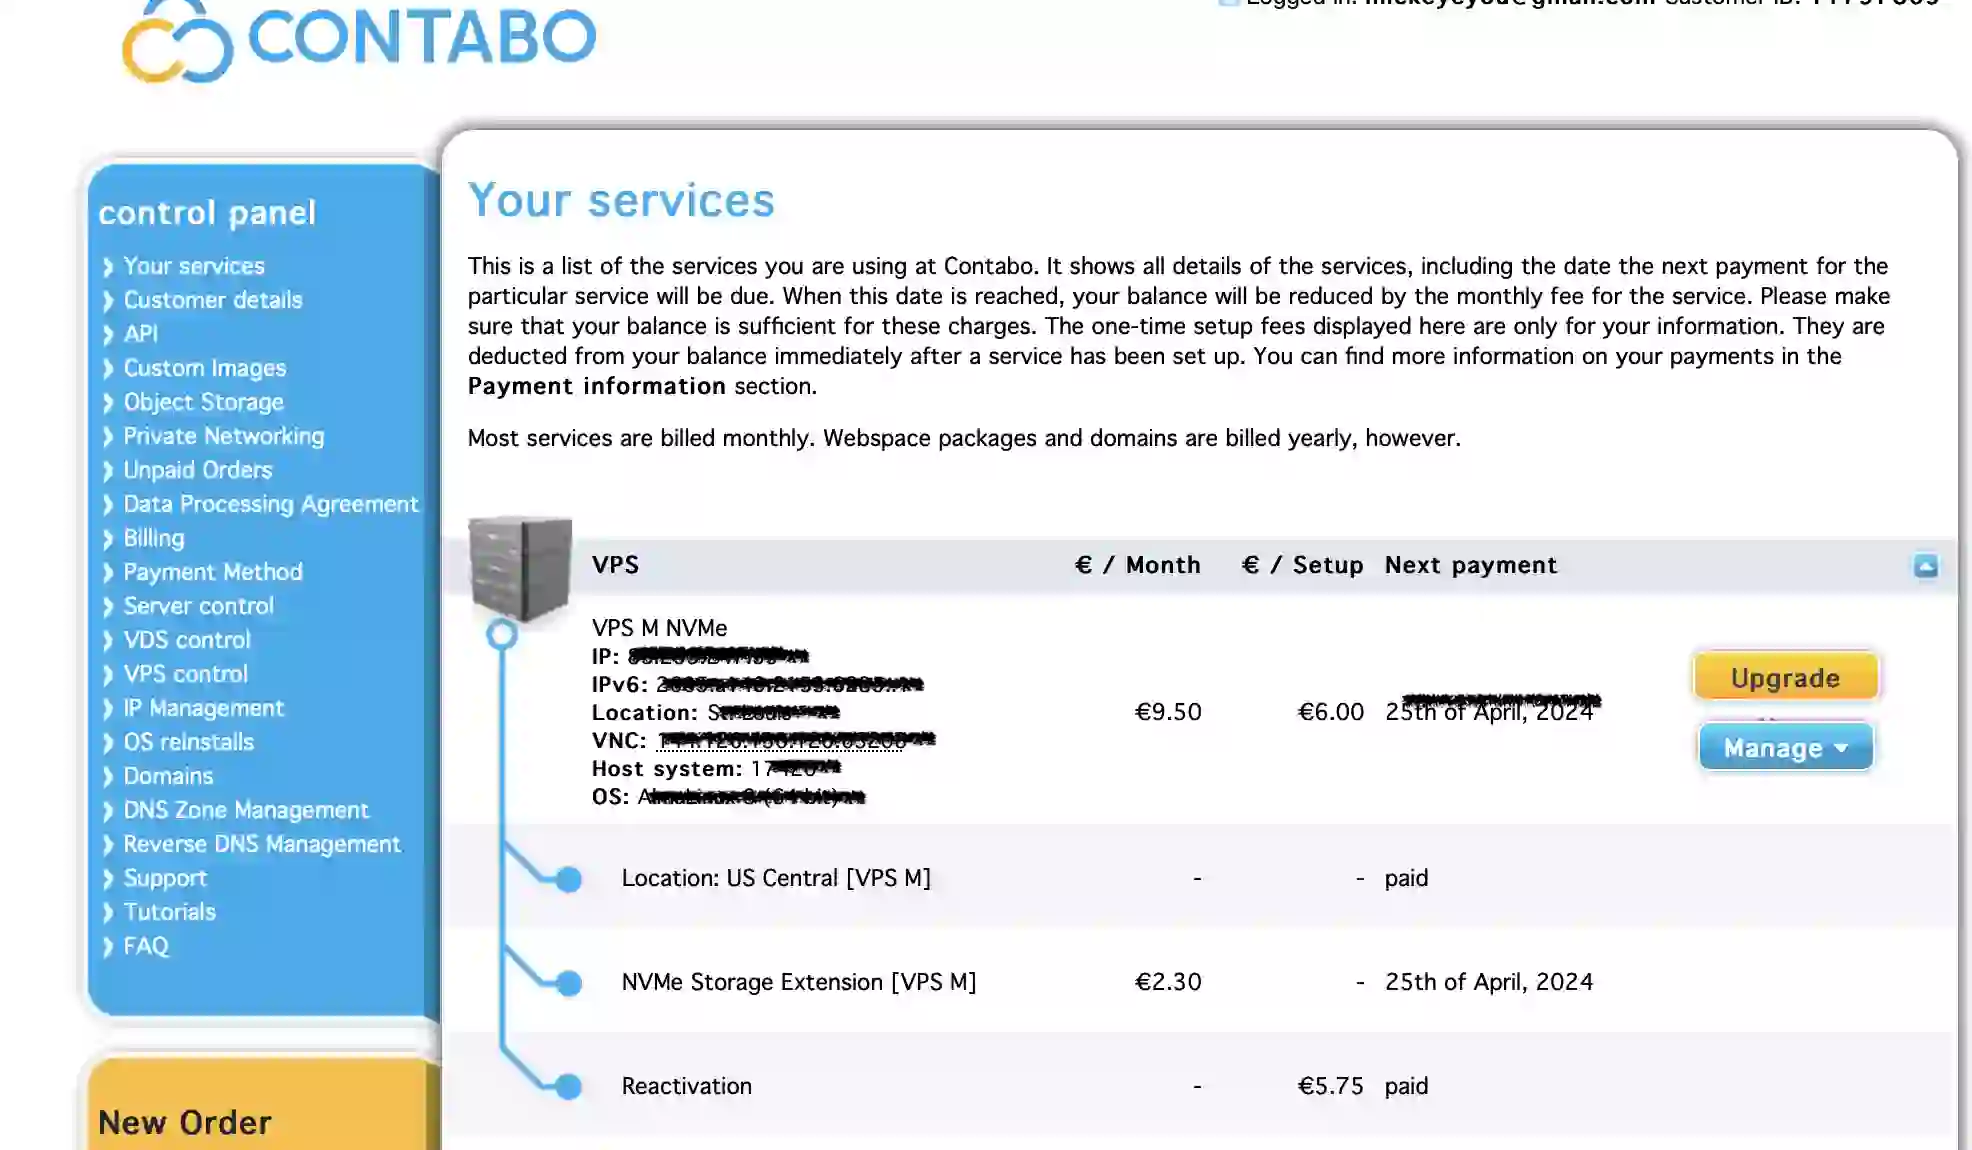
Most important things must remember, you will see the ip address under the VPS NVMe. For example, let we say the ip address the web hosting give you is 88.222.484.22. We gonna move to next step.
3. Connect your domain and your hosting.
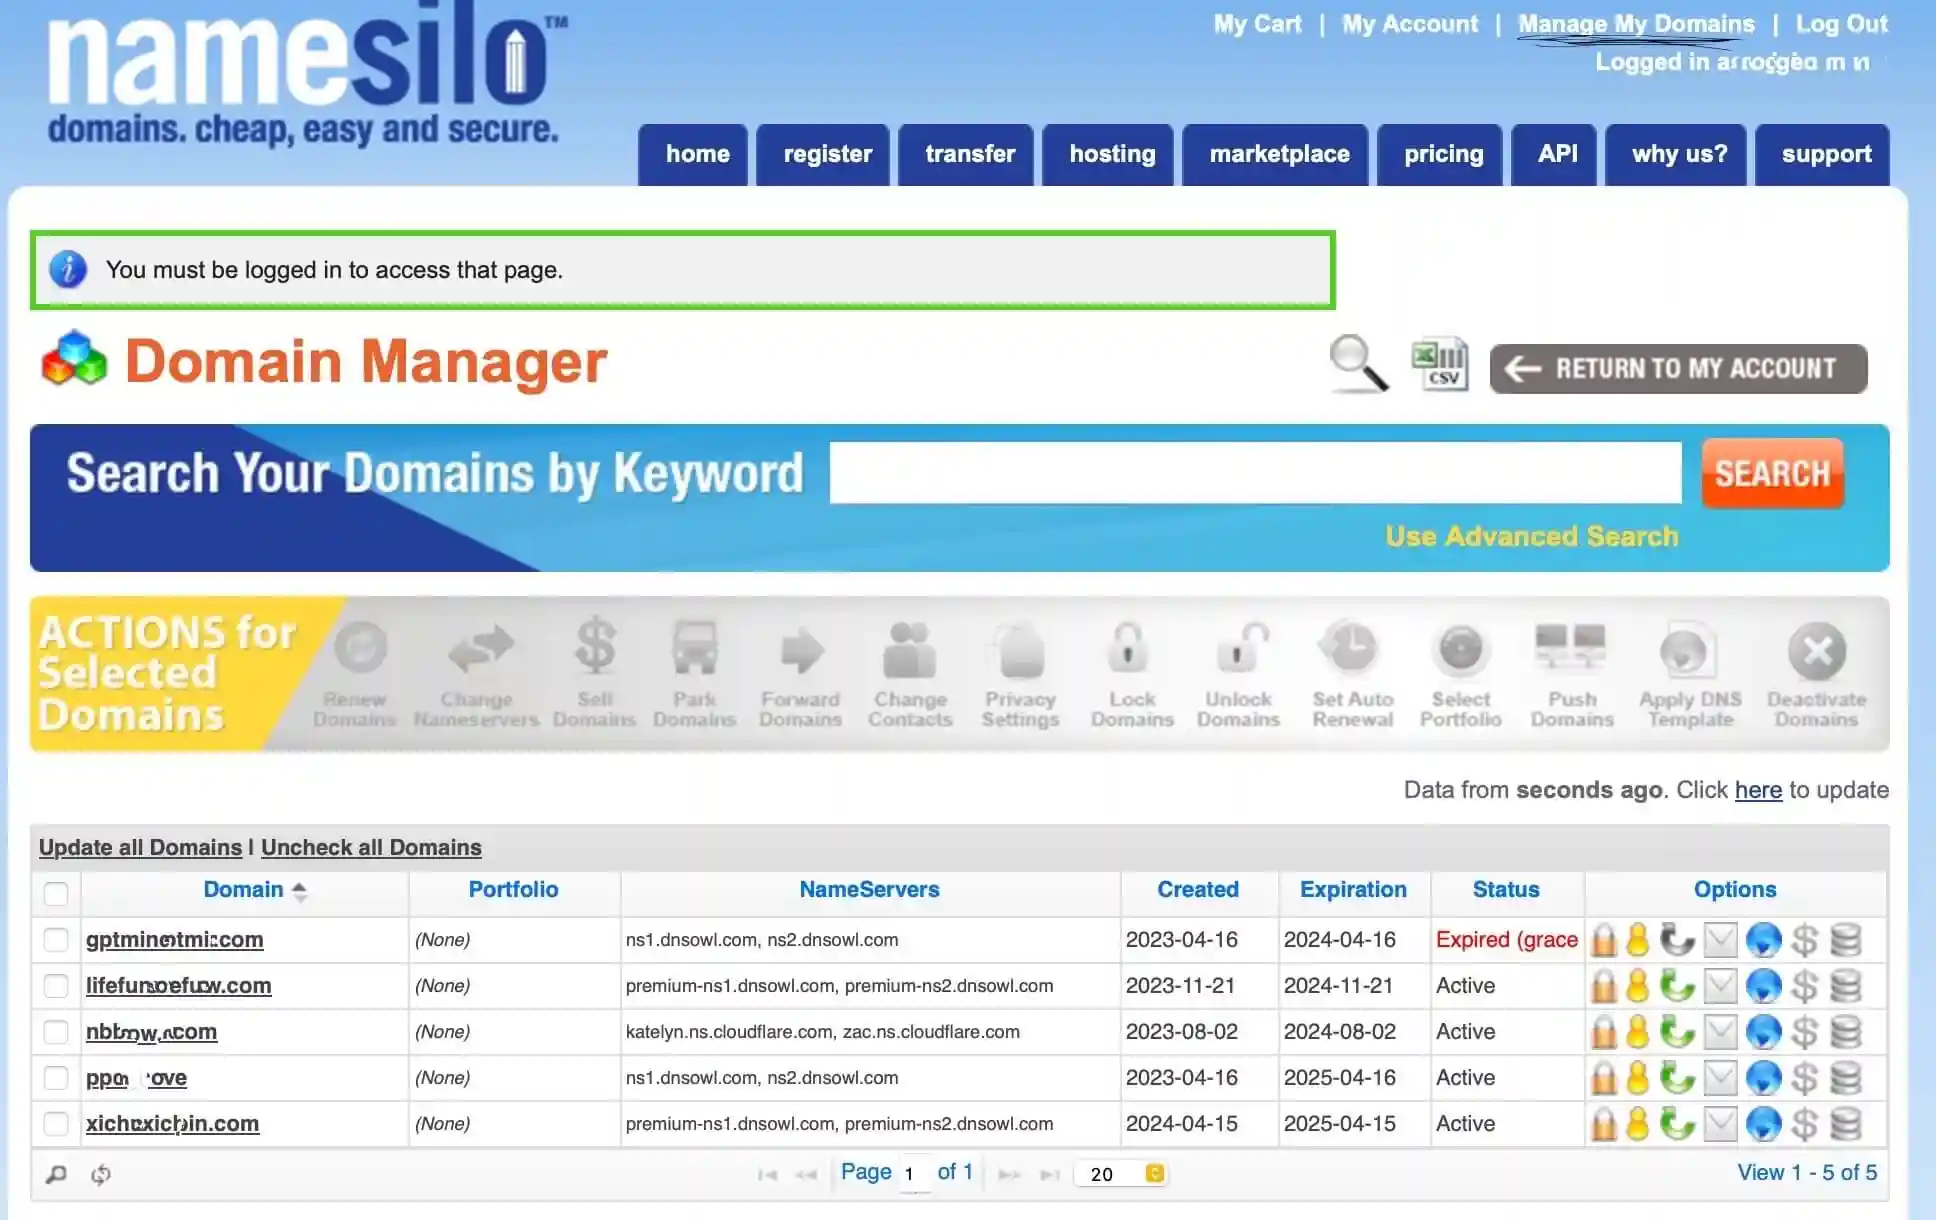
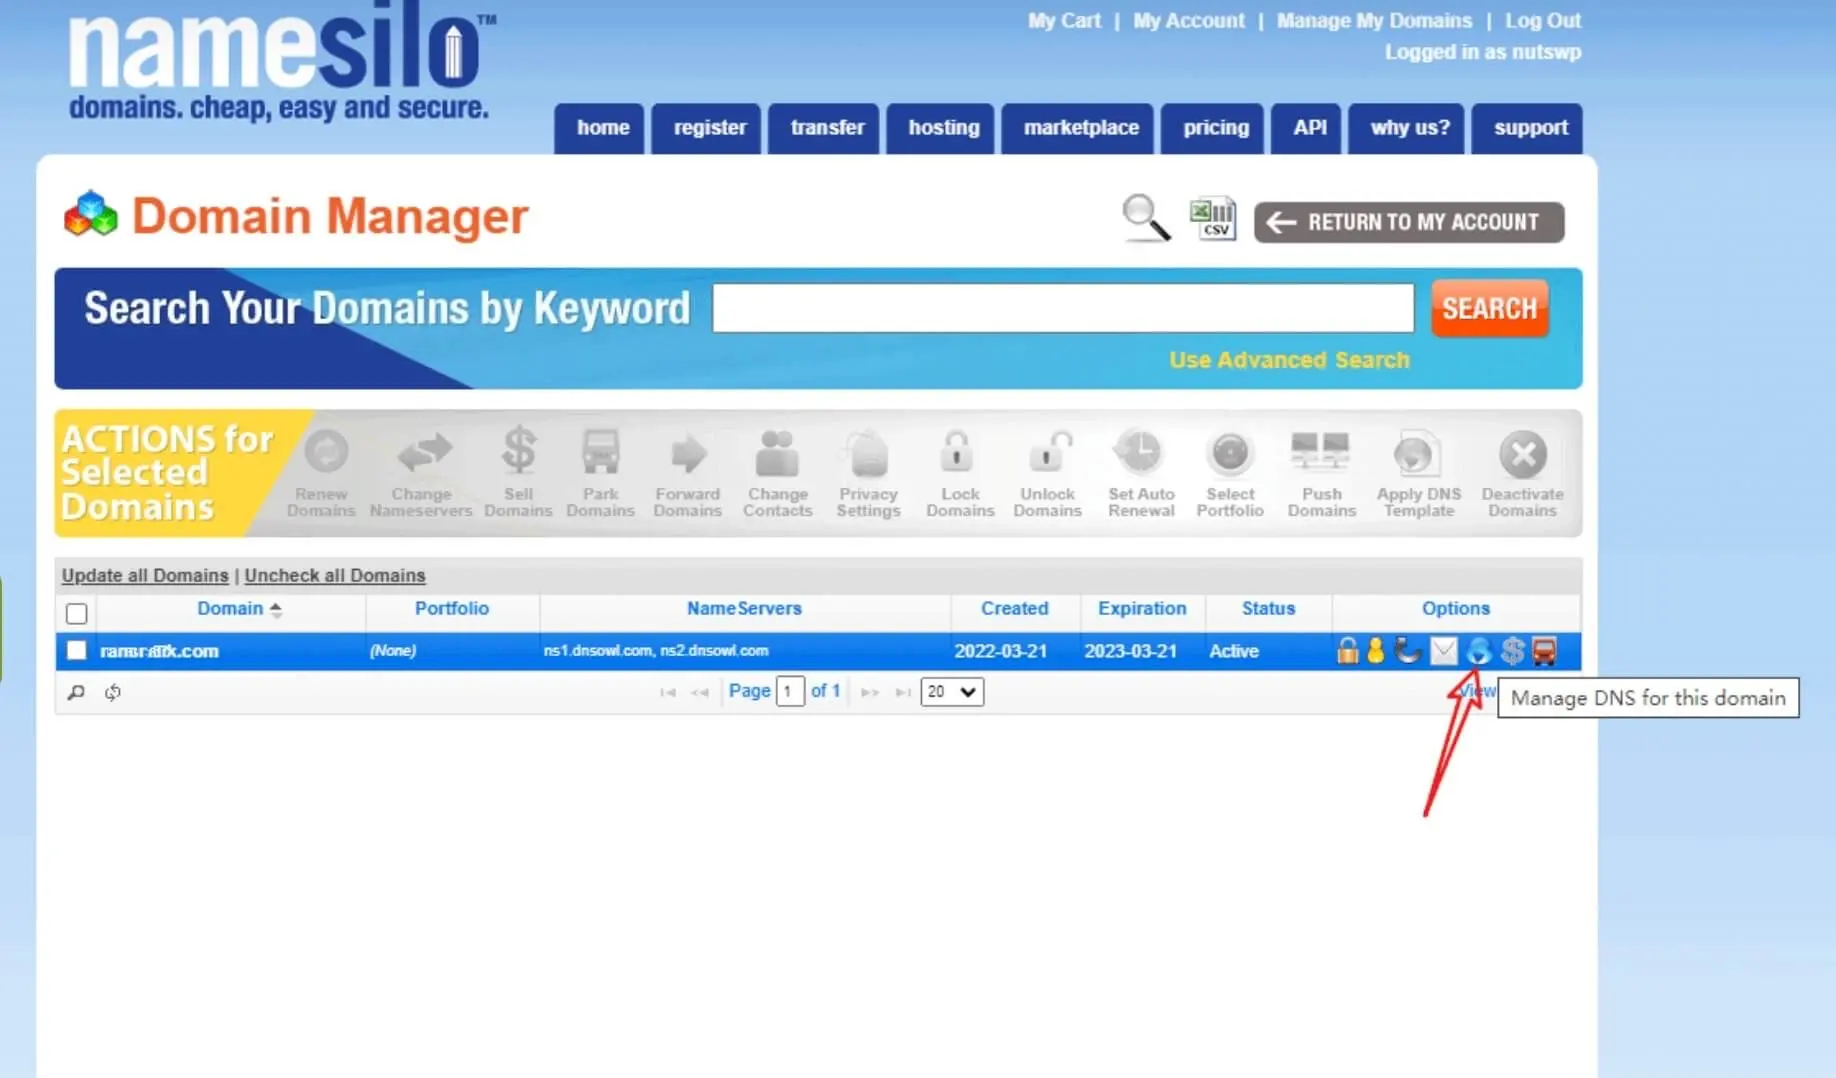
* We bought the domain name from Namesilo, so we have to log into the Namesilo account.
*Please choose “Manage Domains” from the dropdown menu for Domain Names or from the “Manage Your Account” list.
and the Pointing your domain to hosting with A records. The ip address is what the web host give.
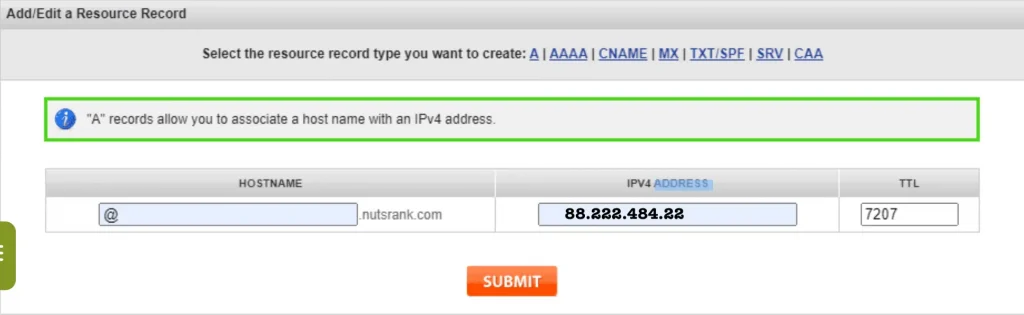
Another a record point to www
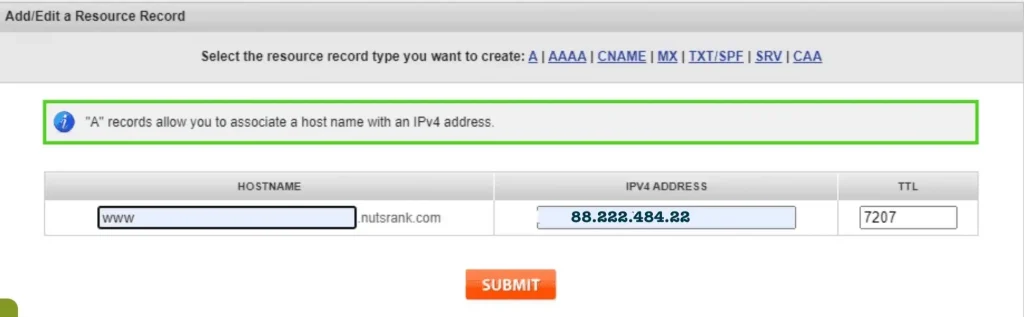
Once the records are created, the domain should be pointing to the web server within 24 hours.
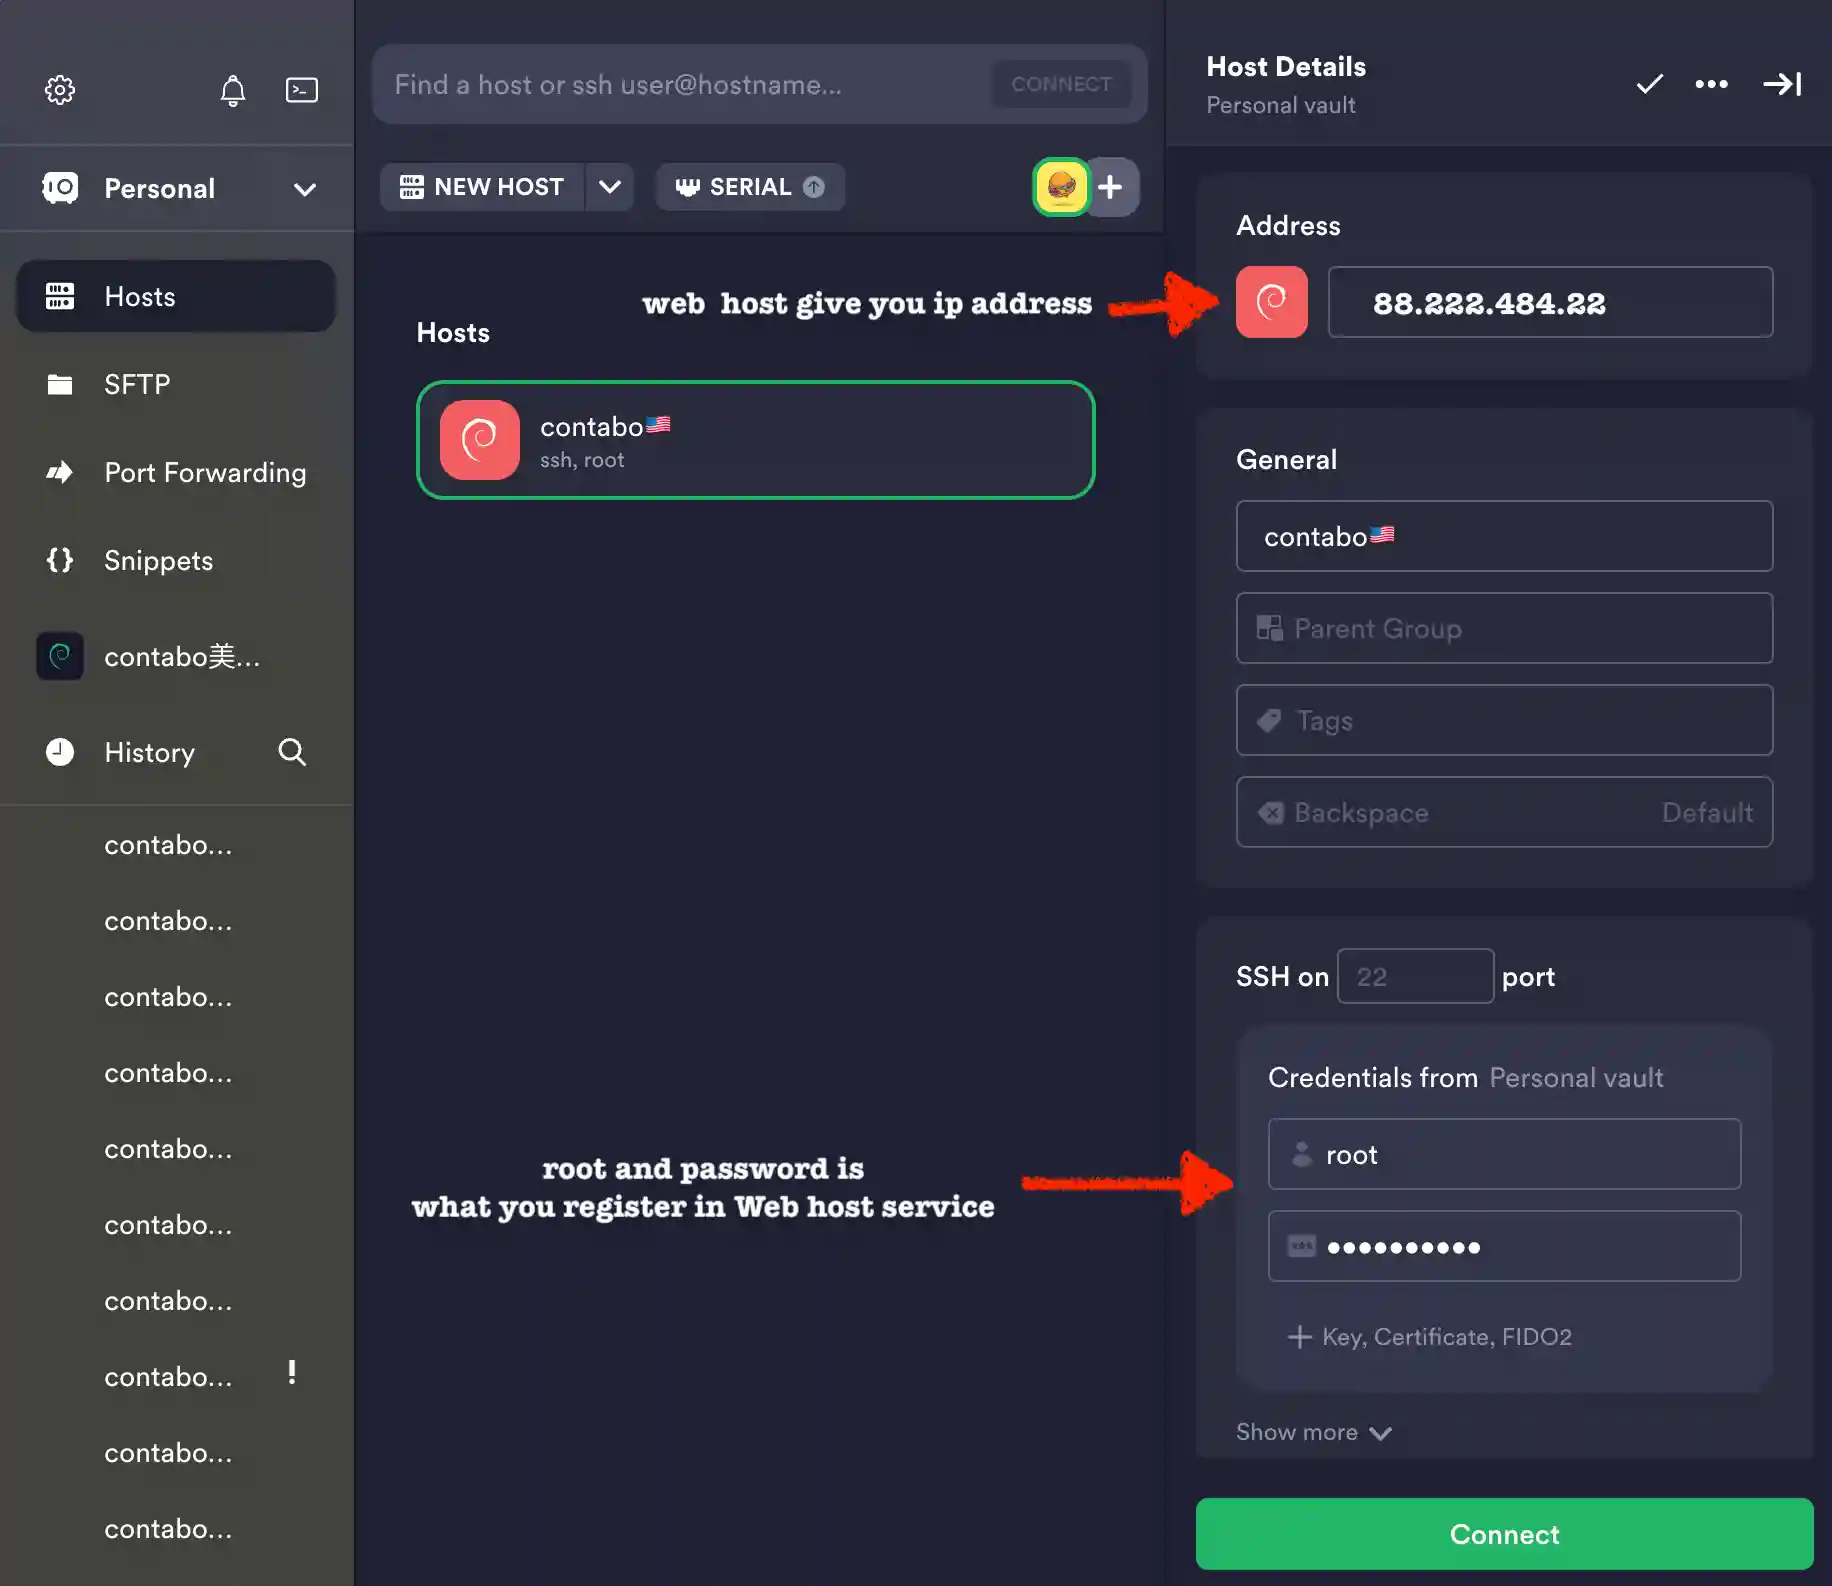
4. Install SSH tools- Terminus software
* first download Terminus software. you also can use other SSH tools.Termius helps to organize the work of multiple DevOps and engineering teams. It reduces the admin work for managing users. Enterprise compliance.
5. Install free aapanel
appanel is The Efficient and secure hosting control panel.[FREE]
Connecting Termius software, based on what OS system you choose when you buy VPS web host service, put installation code in the Termius.
System:
CentOS 7.1+ (Ubuntu20, Debian10), to ensure that it is a clean operating system, there is no other environment with Apache/Nginx/php/MySQL installed (the existing environment can not be installed)
Linux Panel Installation Command
aaPanel is developed based on Centos, we recommend using Centos to install it.
System:
CentOS 7.1+ (Ubuntu20, Debian10), to ensure that it is a clean operating system, there is no other environment with Apache/Nginx/php/MySQL installed (the existing environment can not be installed)
Linux Panel Installation Command
aaPanel is developed based on Centos, we recommend using Centos to install it
Centos :
yum install -y wget && wget -O install.sh http://www.aapanel.com/script/install_6.0_en.sh && bash install.sh
The experimental Centos/Ubuntu/Debian/Fedora installation command supports ipv6. Note that this command is executed with root privileges (Centos8 is supported)
curl -sSO http://www.aapanel.com/script/new_install_en.sh && bash new_install_en.sh
Ubuntu/Deepin :
wget -O install.sh http://www.aapanel.com/script/install-ubuntu_6.0_en.sh && bash install.sh
Debian :
wget -O install.sh http://www.aapanel.com/script/install-ubuntu_6.0_en.sh && bash install.sh
put the blod command above in the Terminus software to finish installation. It will give you user name and password in the end. remember it in order to login into your aapanel. it will look like this in the below.
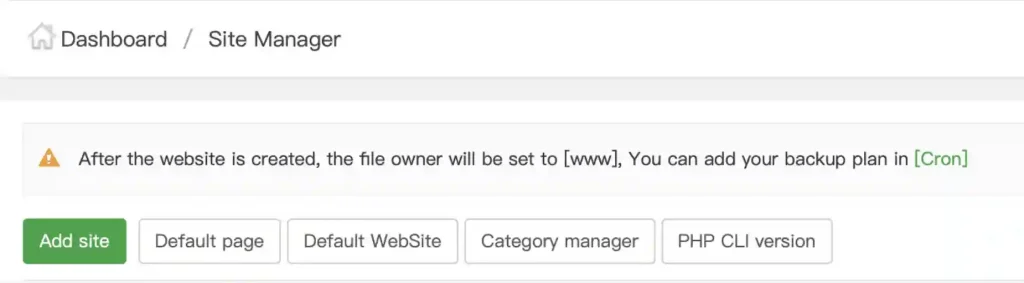
Add a new site
To add a new website, click on the Website button in the left toolbar. Then select the Add site button as indicated below.
Please save the Username and Password information for the next steps in order to use them when choosing Submit to add the website.
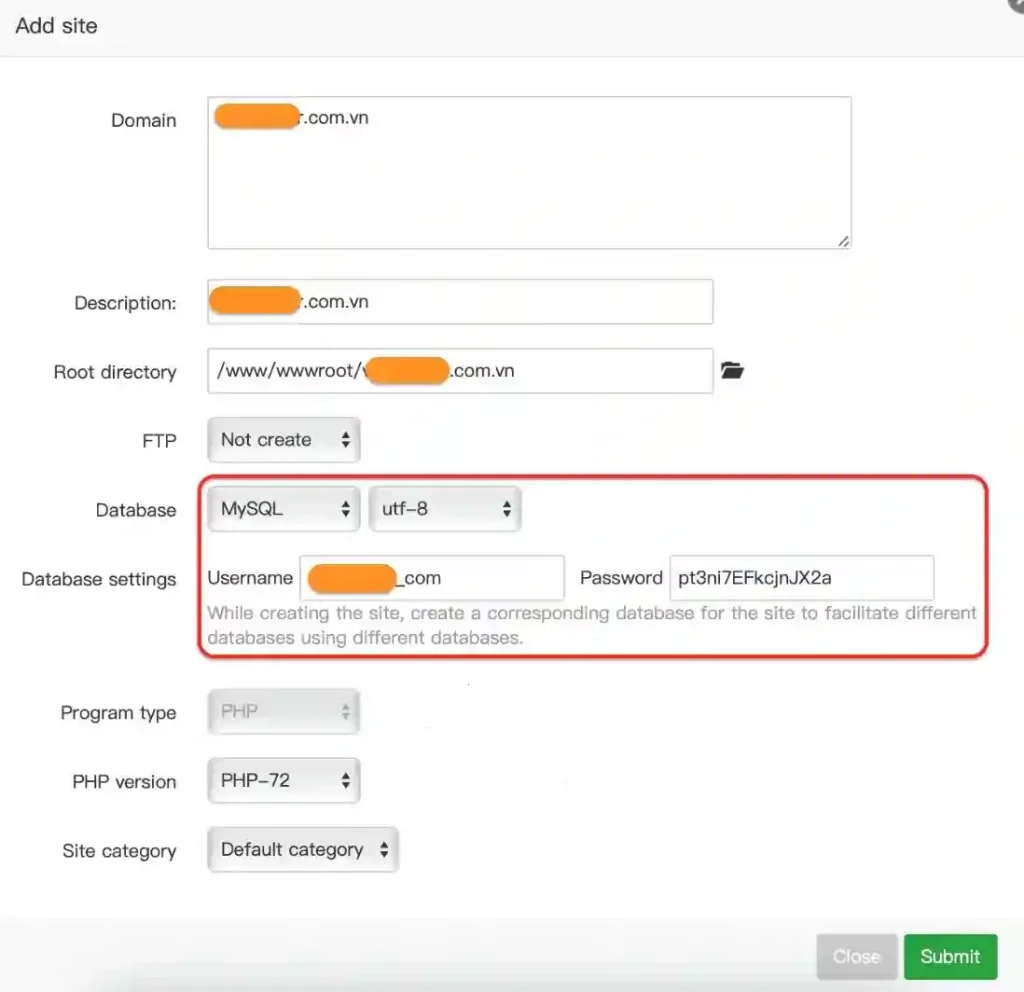
After submitting, the database information will be saved and displayed again for you to review. The database name and user will usually be the same.

we have added the website, the next step is to upload the WordPress source code to the newly created website.
Upload the WordPress source code
You should download the WordPress source code to your computer in advance by clicking on the link below.
https://wordpress.org/download/

Then you go back to the Website feature on the aaPanel interface and choose the Root directory of the website you just added, as depicted below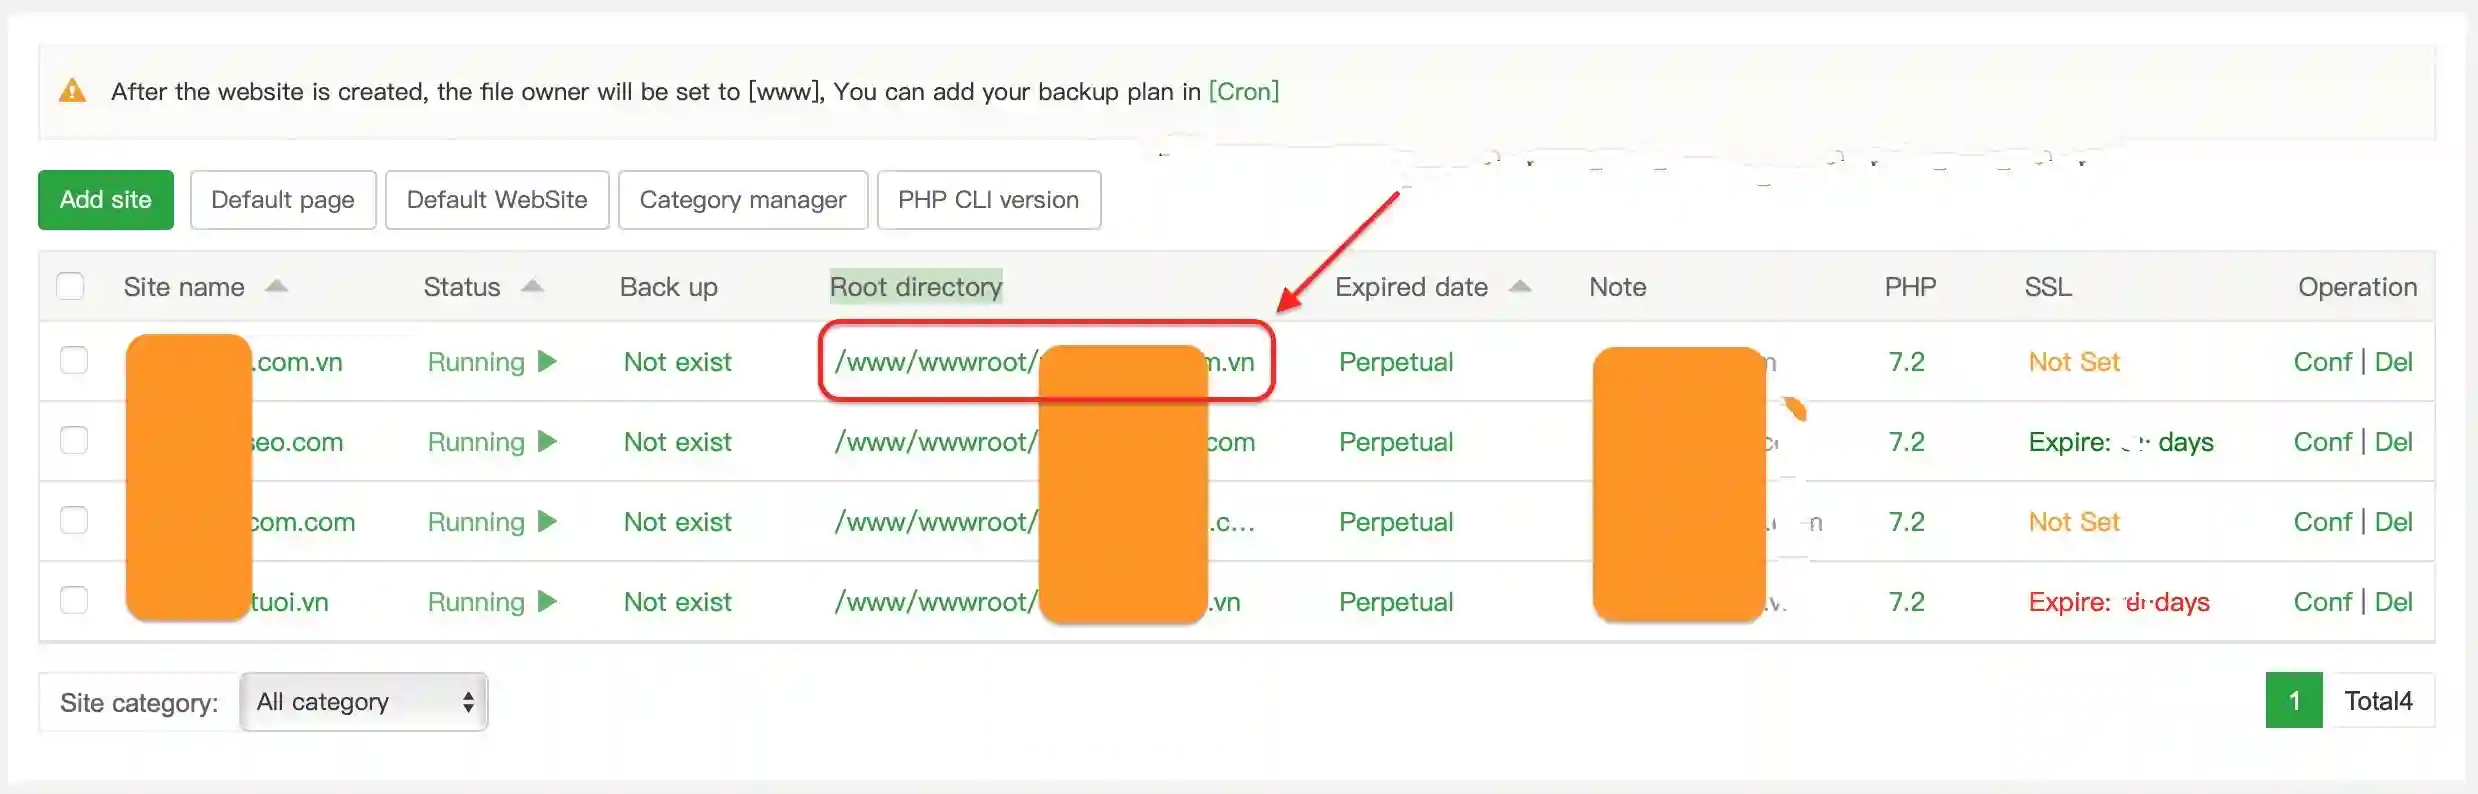
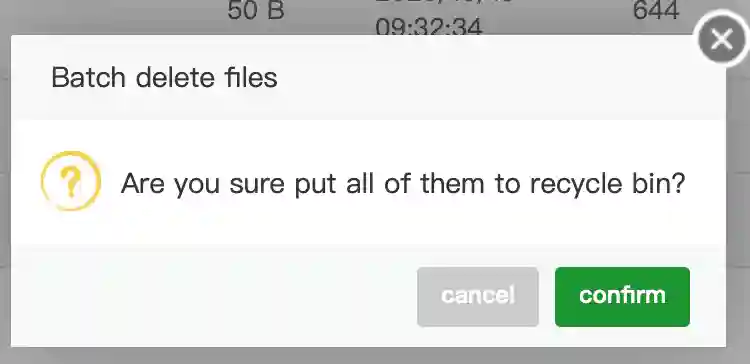
To create a new website on aaPanel, we need to delete all the default files first.
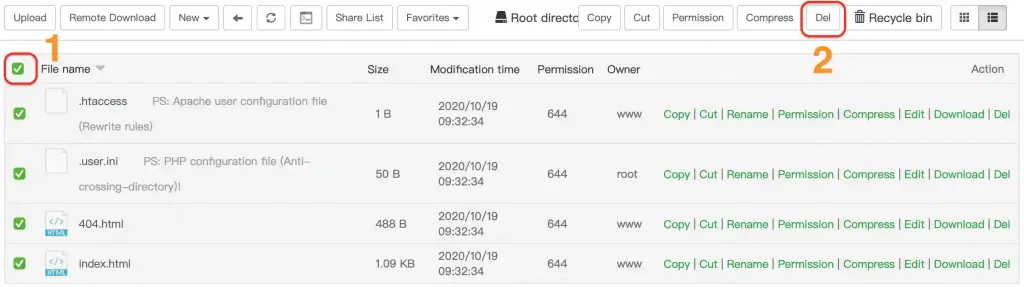
then confirm to delete
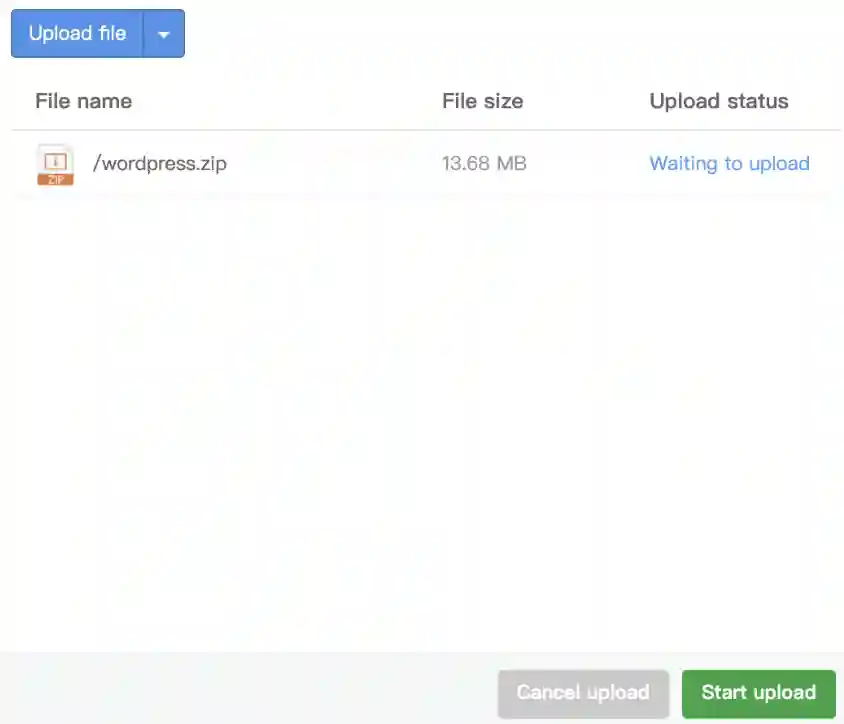
After removing all the existing content, we choose the option to Upload in order to add the WordPress source code file. Then, we click on Start upload to begin the upload process.
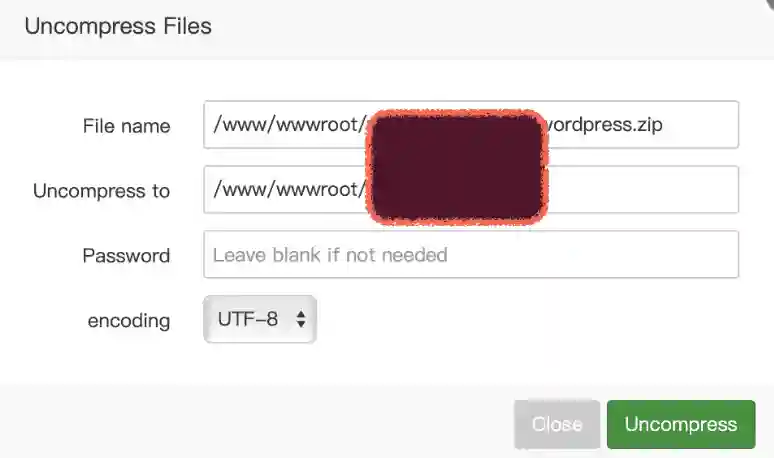
After finishing the uploading process, we decided to Uncompress the file in order to extract the source code from it.

click Uncompress to start extracting.
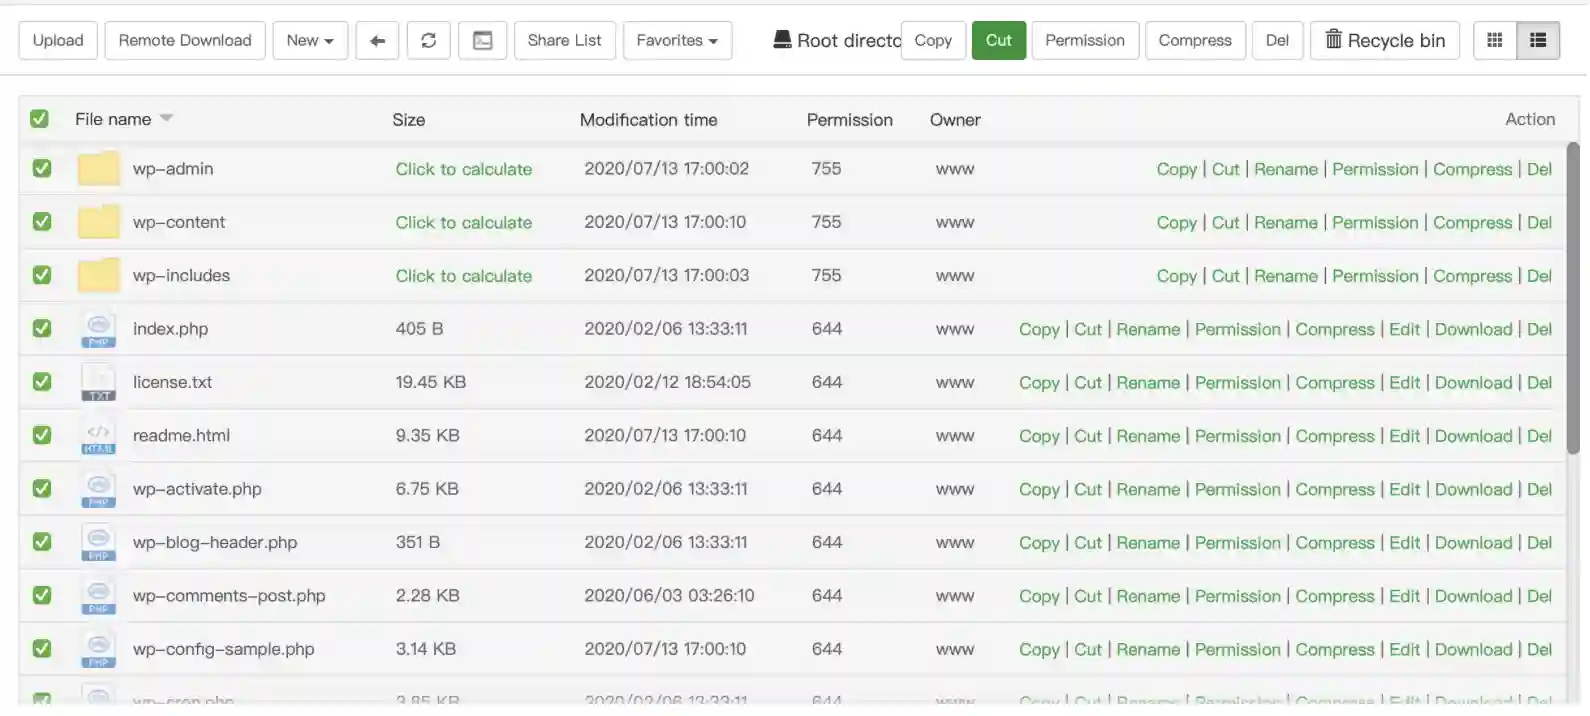
Message Please wait a moment for the system to finish decompressing. Once it’s done, you will see a folder called wordpress. Open this folder, click on all the files inside, and then choose the option to cut them (move them) as shown below.
After we choose the Cut option on a file or folder, we then go back to the original folder or location. We then choose the Paste option to move the file or folder to that original location.

5. setup of WordPress
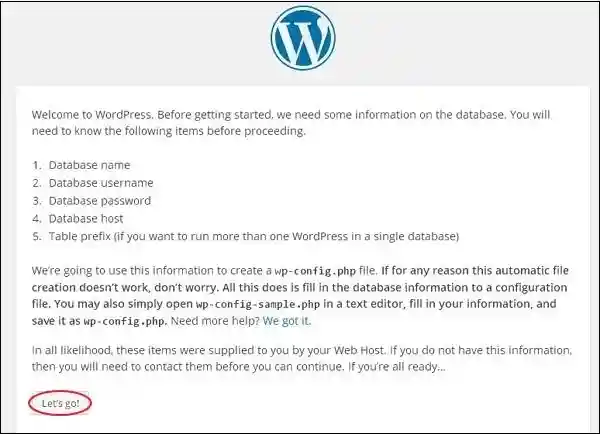
After you finish the first three steps mentioned, you will be able to visit the website to start installing WordPress. [type your domain name in the address bar]If you are unable to access the website, it might be because you haven’t directed your domain name to the correct aaPanel server IP address. In this case, you should reach out to your domain name provider for help.
Click on “Do it now!” on the first page to continue.
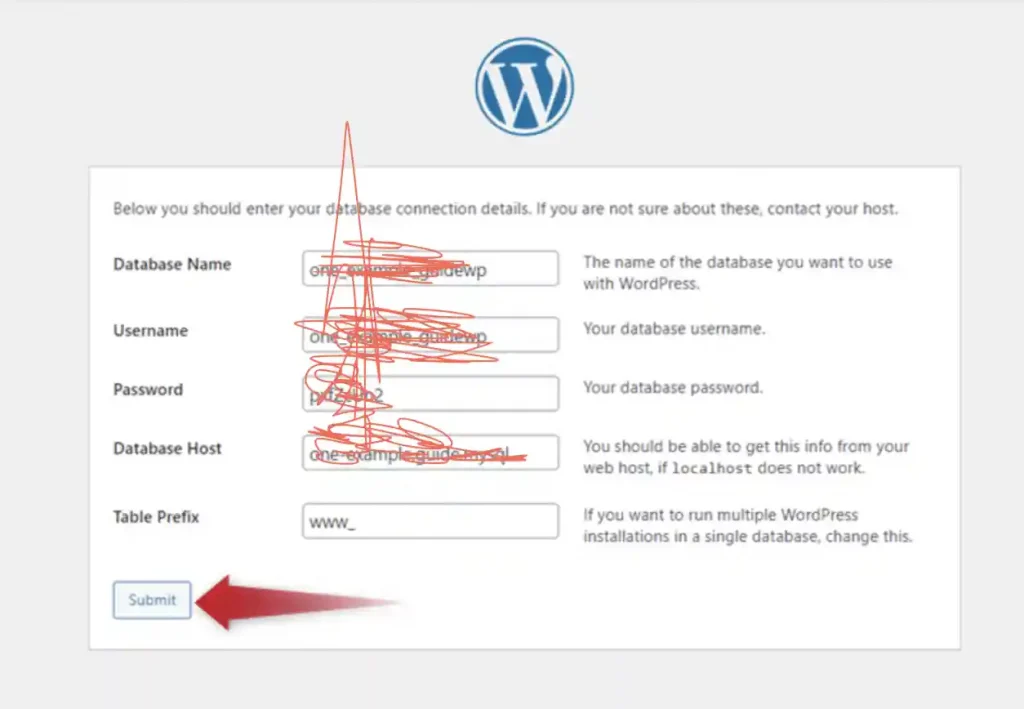
fill in the Database Name, Username, and Password corresponding to the information that you saved in step 2 .. click Submit to continue.
follow the steps until installation successfully. So we have completed all the steps of installing WordPress aaPanel manually.
Hope this article will be of help to you.
Wishing you success!